Lyon, France, September 03, 2020/ Corexpert – APN Training Partner
Corexpert which sustains and integrates solutions on AWS Cloud Platform since 2010 is pleased to announce the new APN Training Partner agreement with AWS.
As IT professionals with high AWS cloud skills we have a proven and reliable history in technical trainings. We are now proud to further expand this training and learning opportunities through the APN Training Partner Program.
We will thus convey our expertise to give companies the opportunity to learn best practices and provide them with live feedback from our expert instructors AWS Approved Instructors. These trainings will also help learners to prepare AWS Certification exams, which validate technical skills and expertise.
We also aim to provide the top learning resources and deep knowledge learners need to innovate and build the future using the AWS Cloud. AWS Training content is built on native AWS knowledge and gives learners a path to advance their careers and transform their organizations.
A free of charge virtual webinar will be held on the 29th September 2020 at 10AM (CEST) on the theme: AWS Discovery Day – An introduction to AWS.
AWS is an environment that is always shifting and evolving : there are numerous updates and news which drive the continuous innovation from AWS.
How do you verify the competency for building, deploying and maintaining the infrastructure offered by the platform ?
With the certifications proposed by AWS !
Categorized in competencies, these exams reward counseling the right services, promote a well architected framework and check the knowledge of the candidate based on deep professional hands on experience.
Today, TeamWork and Corexpert have reach a milestone in the total number of certifications obtained : our team has 50 certifications. This commitment in the AWS cloud is a testimony of adaptation and capacity to answer at a large panel of requests from customers. Our experts are ready to be challenged by your interrogations and will guide you to success on AWS projects. Cost optimization, migration from on-premise, tasks automatization are some problematics (and many more !) which our team can help for your journey to the cloud.
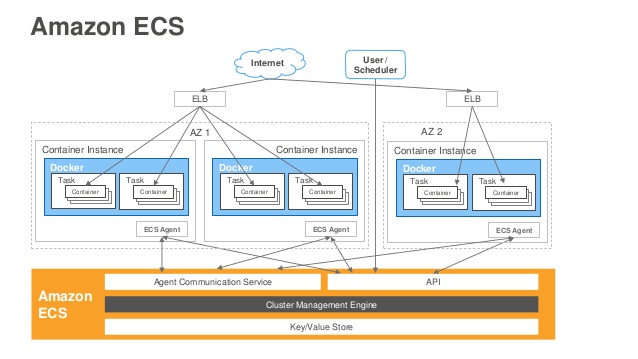
We continue the serie “First steps with Amazon EC2 Container Service” focusing on the tasks and clusters that will host them.
1 – What is a Cluster
An ECS cluster is a group of EC2 instances that will host your containers
ECS Cluster
A cluster can contain one or more instances of different types and sizes. In our case, we will be using a t2.micro.
2 – ECS cluster creation
We are going to connect to the aws web console for ecs. We will go to the “Cluster” section on the left menu.On the next screen (Cluster list), we are going to click on “Create Cluster” so we can create our first cluster.
On creating cluster screen we have a very complete form with many options. We are going to use the following fields :
Cluster Name : helloworldCluster
Provisioning Model : On-Demand Instance
EC2 instance type : t2.micro
VPC : choose the VPC where you want to create your instances
Security group : choose/create a security group that opens port 80
Click the “Create” blue button to create the cluster.
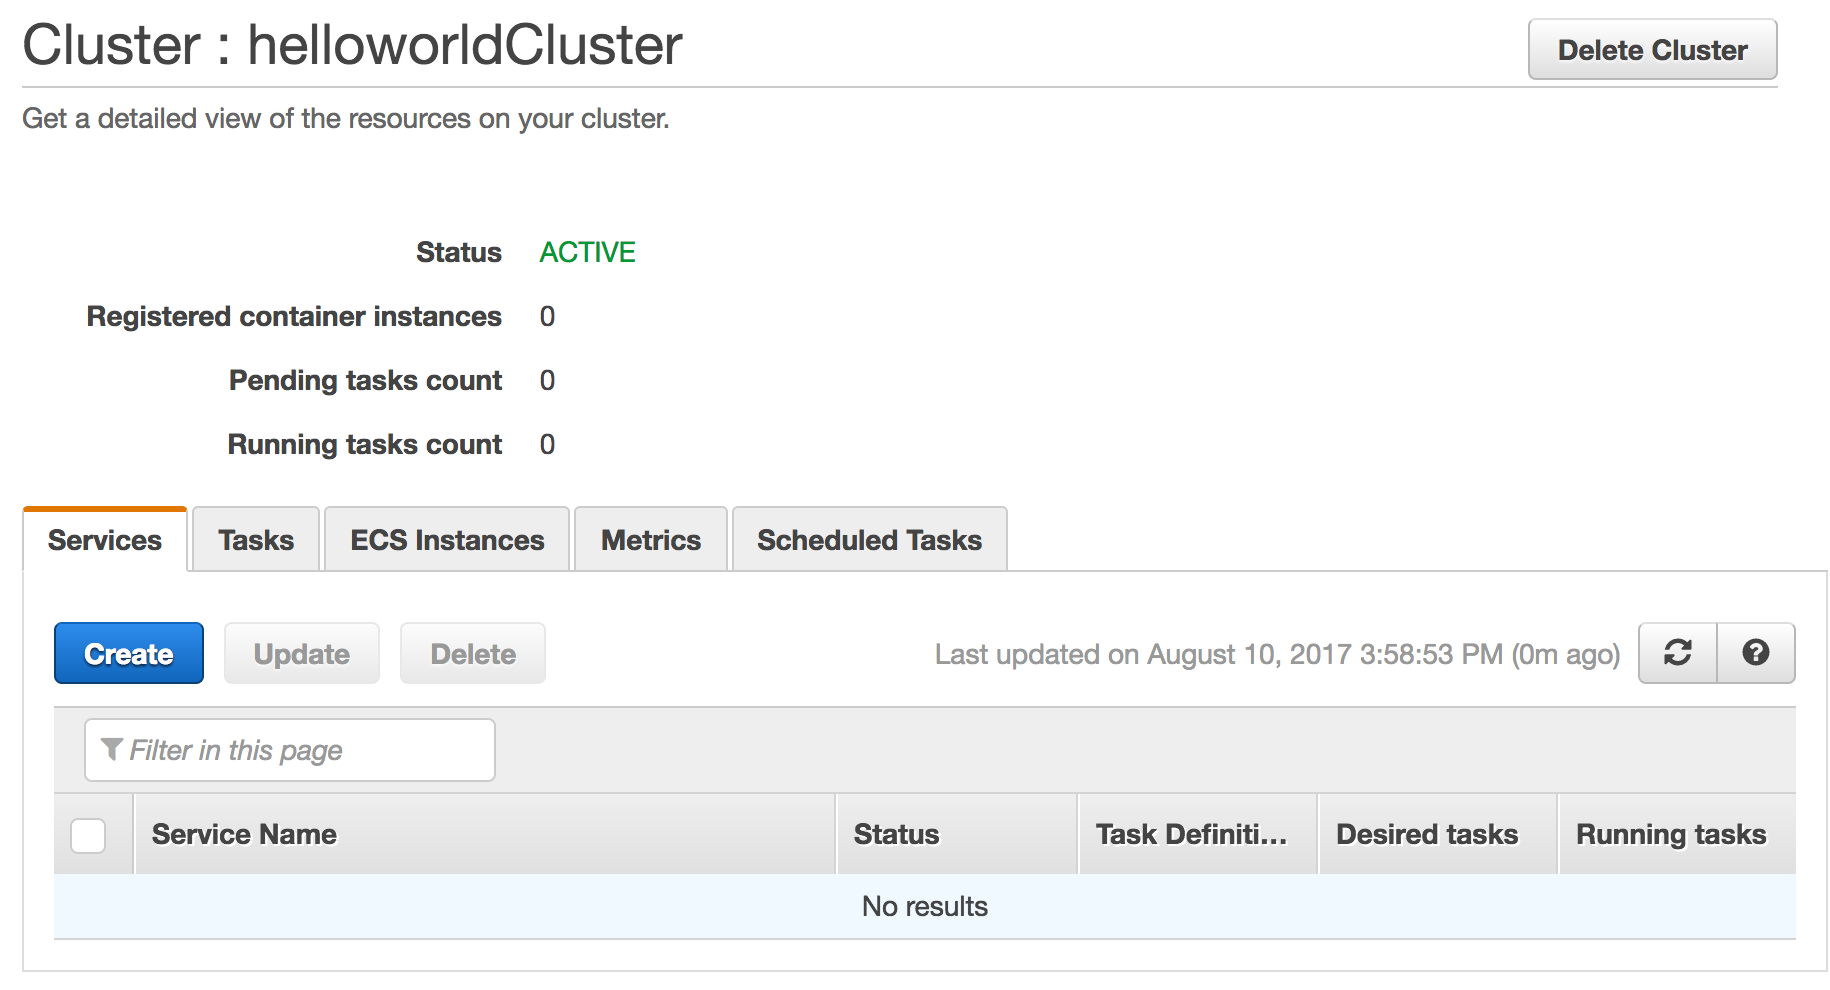
It should now appear in the clusters list
ECS Cluster
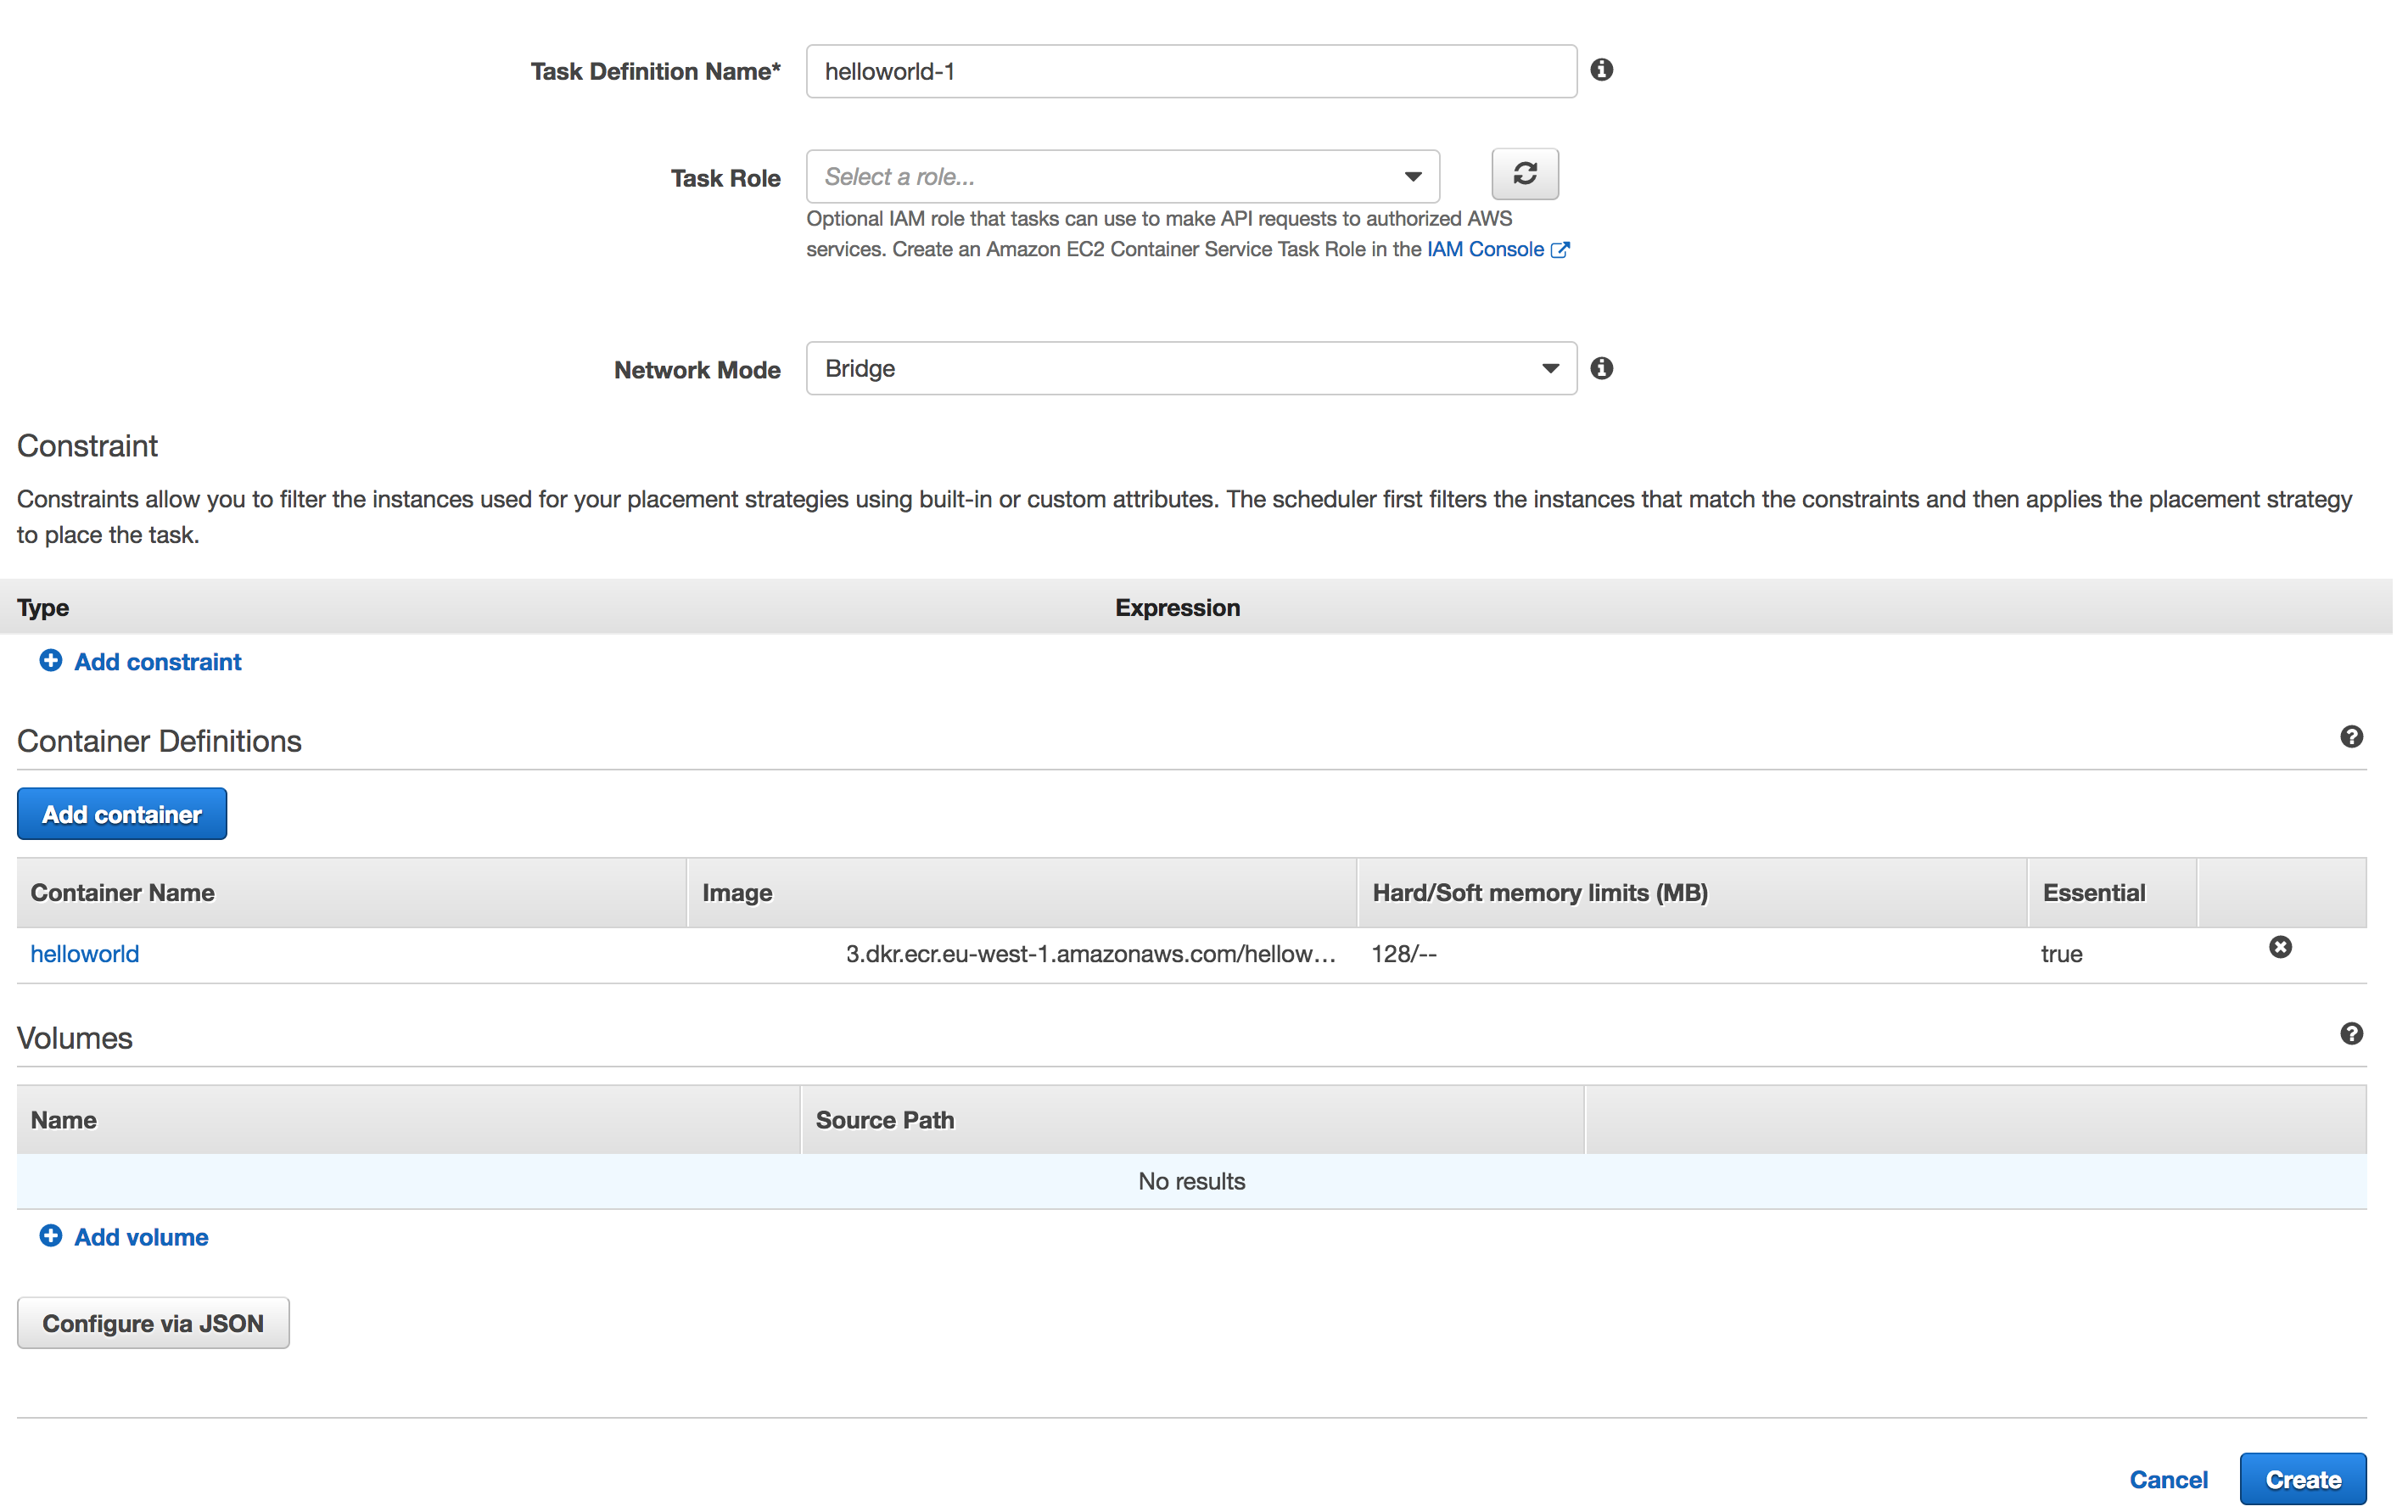
3 – Task definition or how to define the containers launch
A task definition is a list of parameters which will determine how our containers will be launched of.
To create it, we will go to “Task definitions”on the left menu, then we will click the “Create new Task Definition” blue button.
This first task definition will allow us to launch a container, with its HTTP (80) port linked to the host instance’s port 8080.
For our case we are going to fill the following fields:
Plenty of other options are available in the Container Definitions, to allow a precise definition of the needs of the containers (Mapping of volumes, link between containers …)
4 – Task execution
Now that we have created our host machine cluster and we have described how to launch the container, we can finally run it.
To do this, we will click on the “Cluster” menu and choose from the list our helloworldCluster cluster. We get to here:
ECS Cluster Hello world
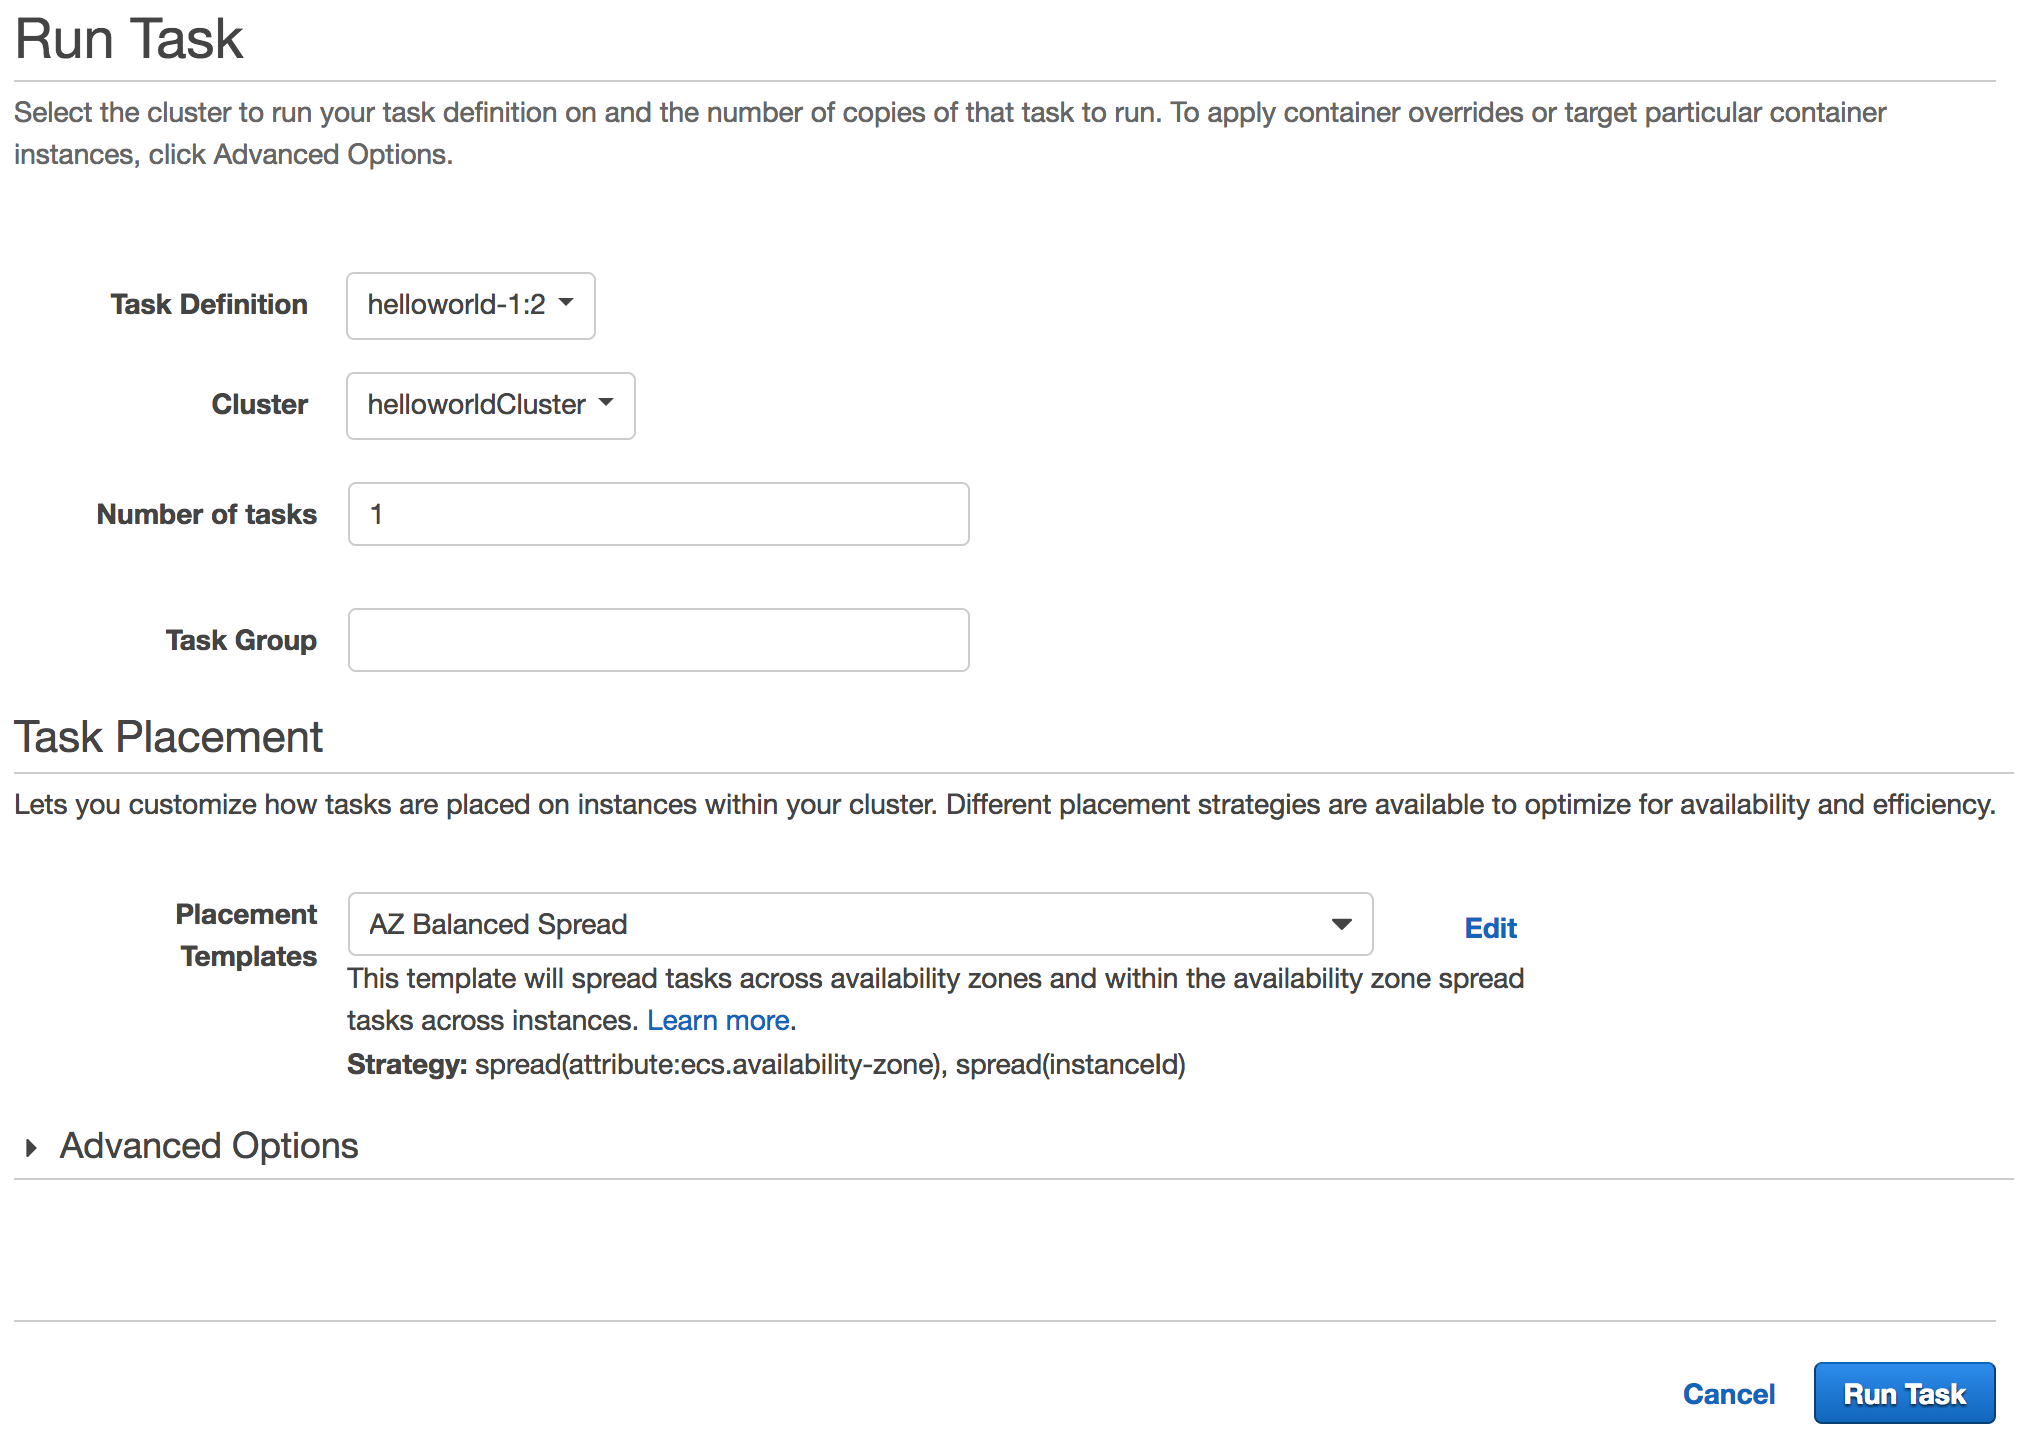
Click on the “Task” tab and then on the “Run new Task” button
In the next screen we will choose all the elements we created previously
ECS run task
The task is created and ready to receive messages
5 – Connection to the container
All that remains is to validate that the container respond our HTTP requests.
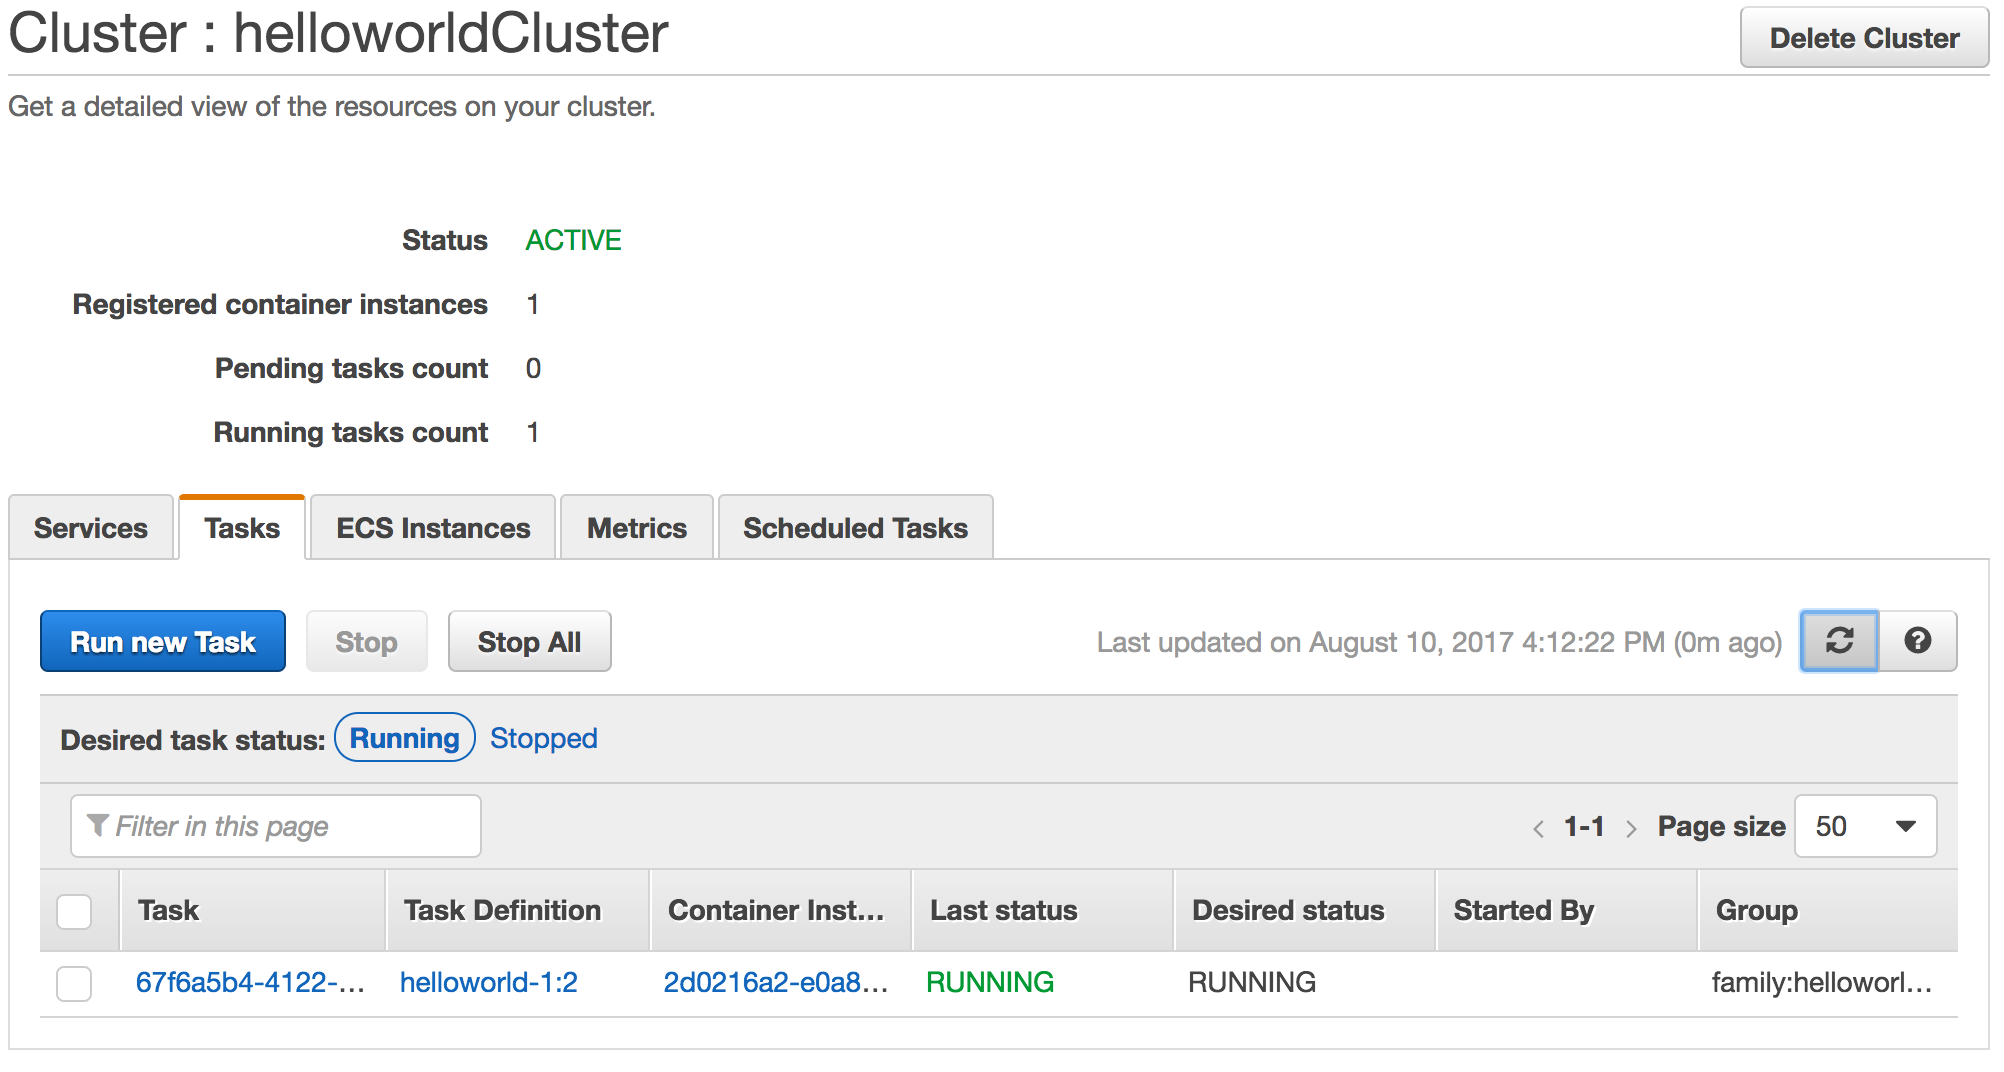
We will connect directly to the host instance on port 8080.
To find its IP, just click on the name of the task (in our case 67f6a5b4-4 …) to display the details.
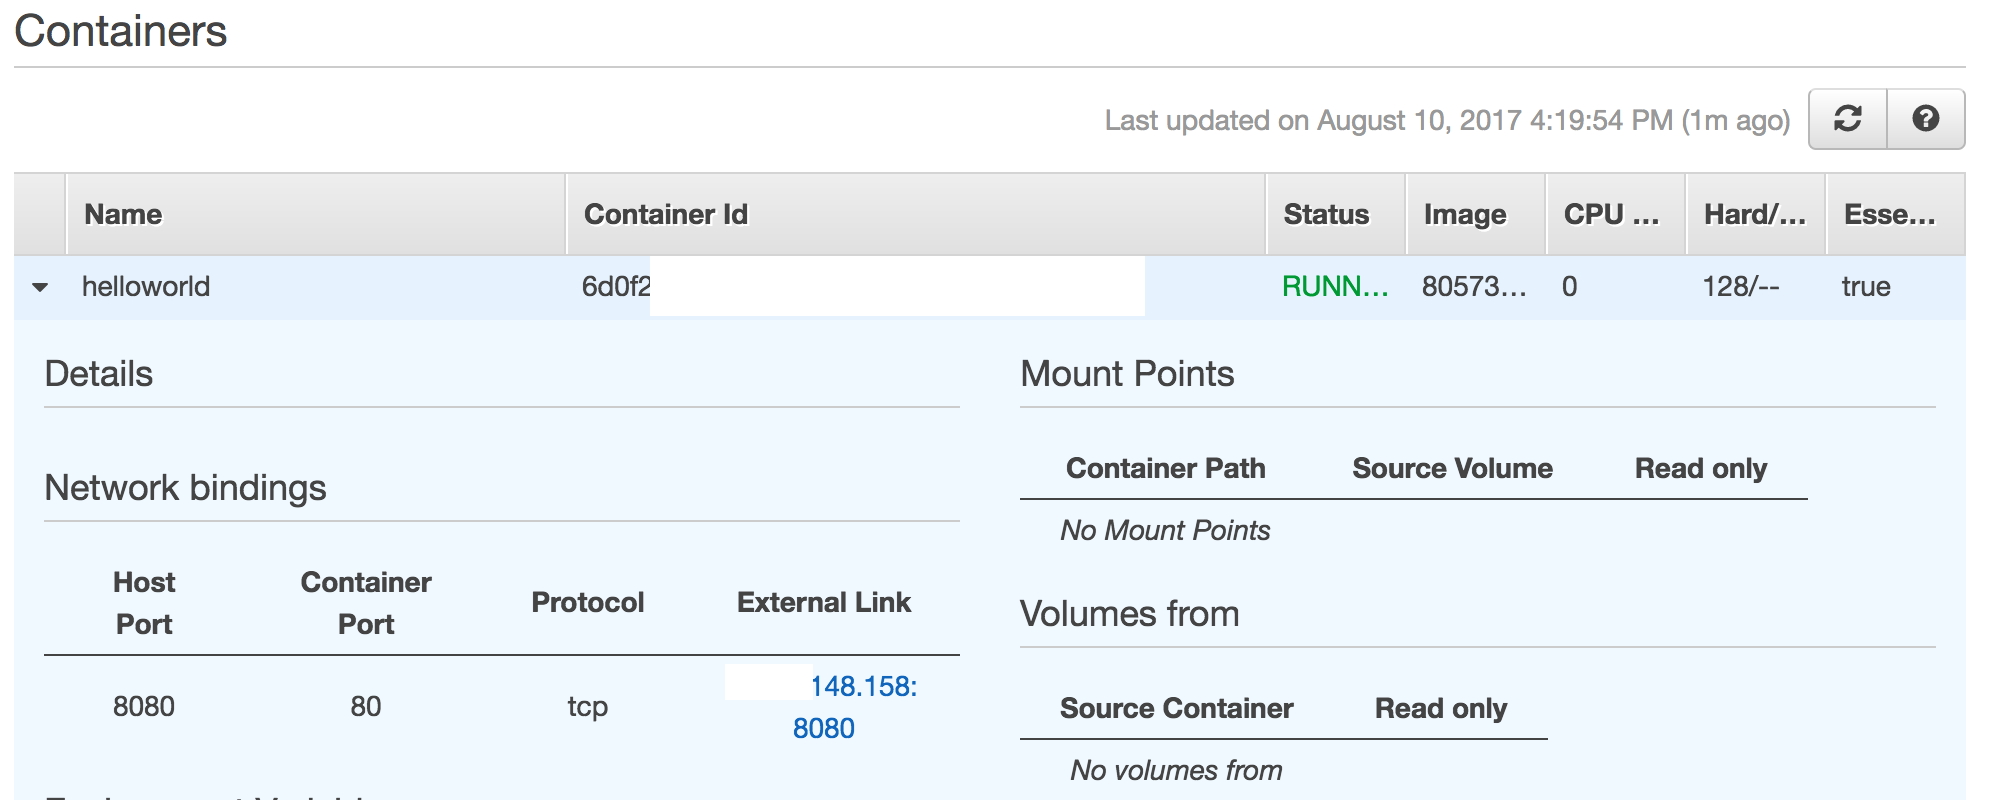
In the container part click on the triangle next to the container name (helloworld) to display the details, the IP will be in the section “Network Bindings”
ECS host IP
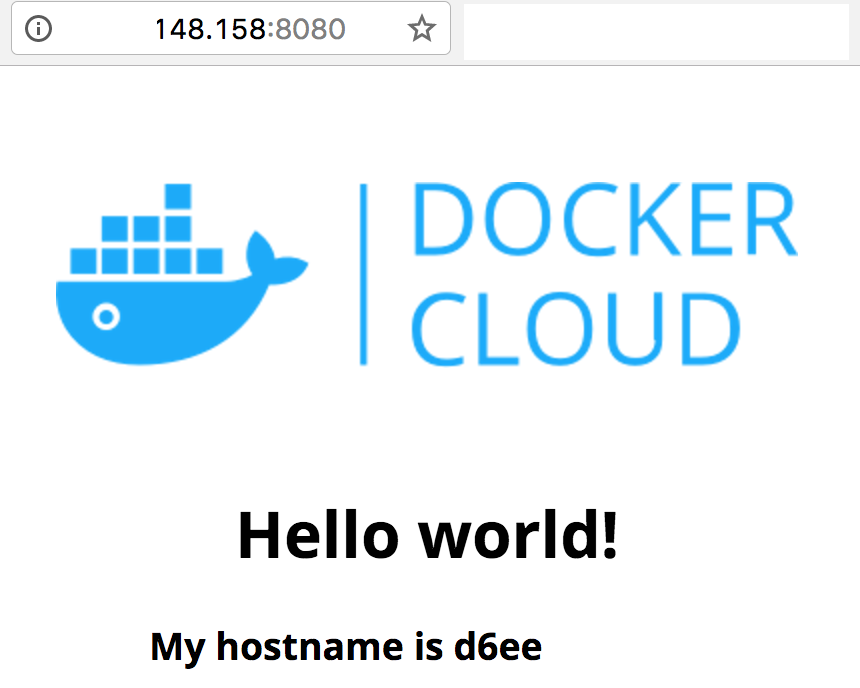
You can then go to your preferred browser, and enter the url of the container to display the page
ECS task result
Congratulations, you have ran your first container on Amazon EC2 Container Service.
In the next article we will see how to go further by creating a service based on the existing container image. Thus several containers will be launched and will be able to respond to your requests
First steps with Amazon EC2 Container Service (101) – ECR
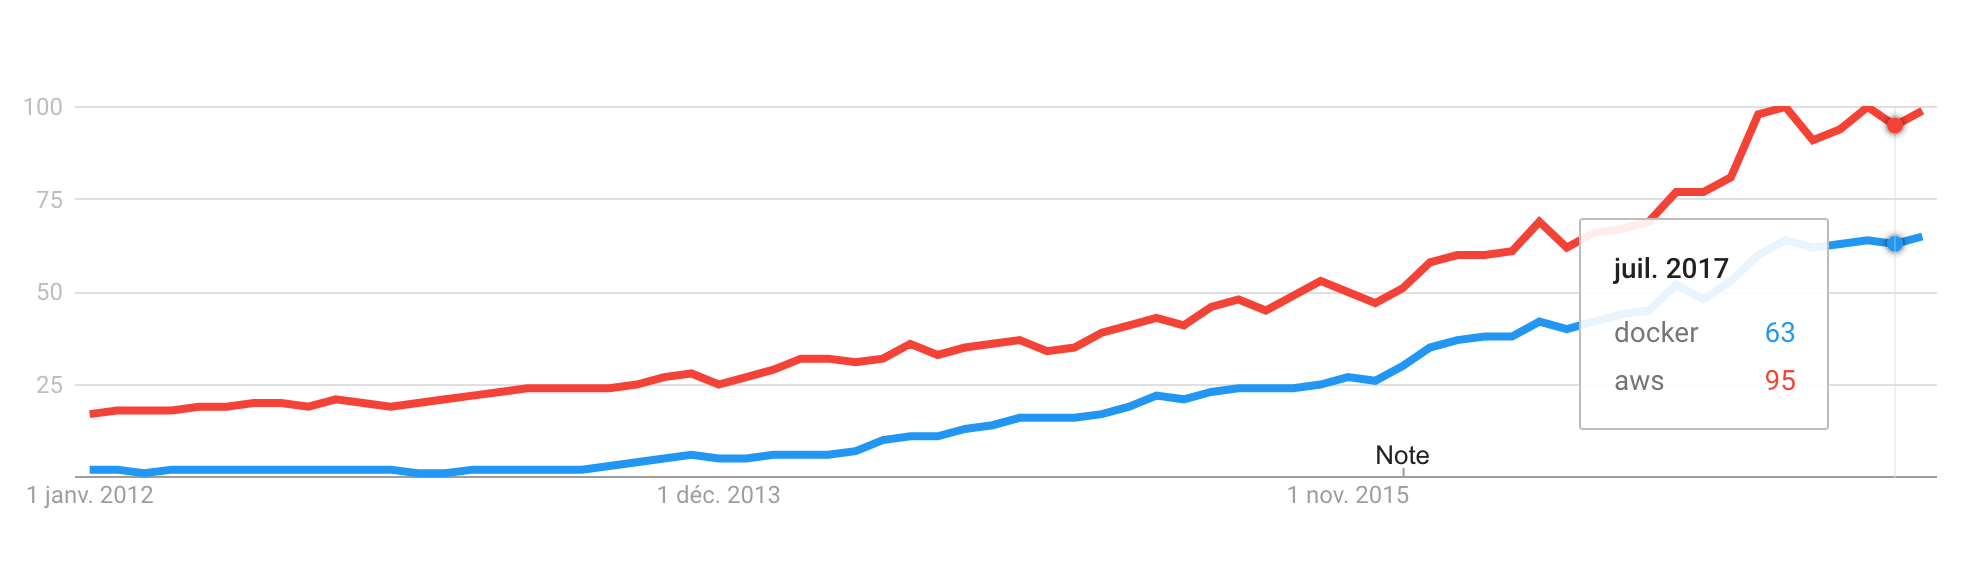
Docker is a technology that has been doing a huge echo in the IT field since the past few years.
docker-vs-aws on google search
All major public clouds (Amazon Web Service, Google Cloud, Microsoft Azure) offer a more or less integrated solution for container management. In these posts we will explain how to start successfully on the managed service Amazon EC2 Container Service.
This serie suppose that you already have created a VPC where the host instances for the docker containers will be created, that the AWS CLI is installed on your computer and we are going to use the “Hello-world” image (dockercloud/hello-world) available on the docker hub.
1 – Creation of a Docker private repository
To be deployed , a container image must be available in a docker repository. There is multiple solution that can be used , Amazon Web services (AWS) proposes a private managed repository (ECR) at an interesting price (0,1$/GB/month on 01/08/2017).
To deploy our image on the ECR (Amazon EC2 Container Registry) we will start by pulling this image from the docker hub.
1
docker pull dockercloud/hello-world
Now we have our image, we will push it on ECR
Then, we will connect to the AWS web console for ecs
1a – if you still haven’t use the service yet
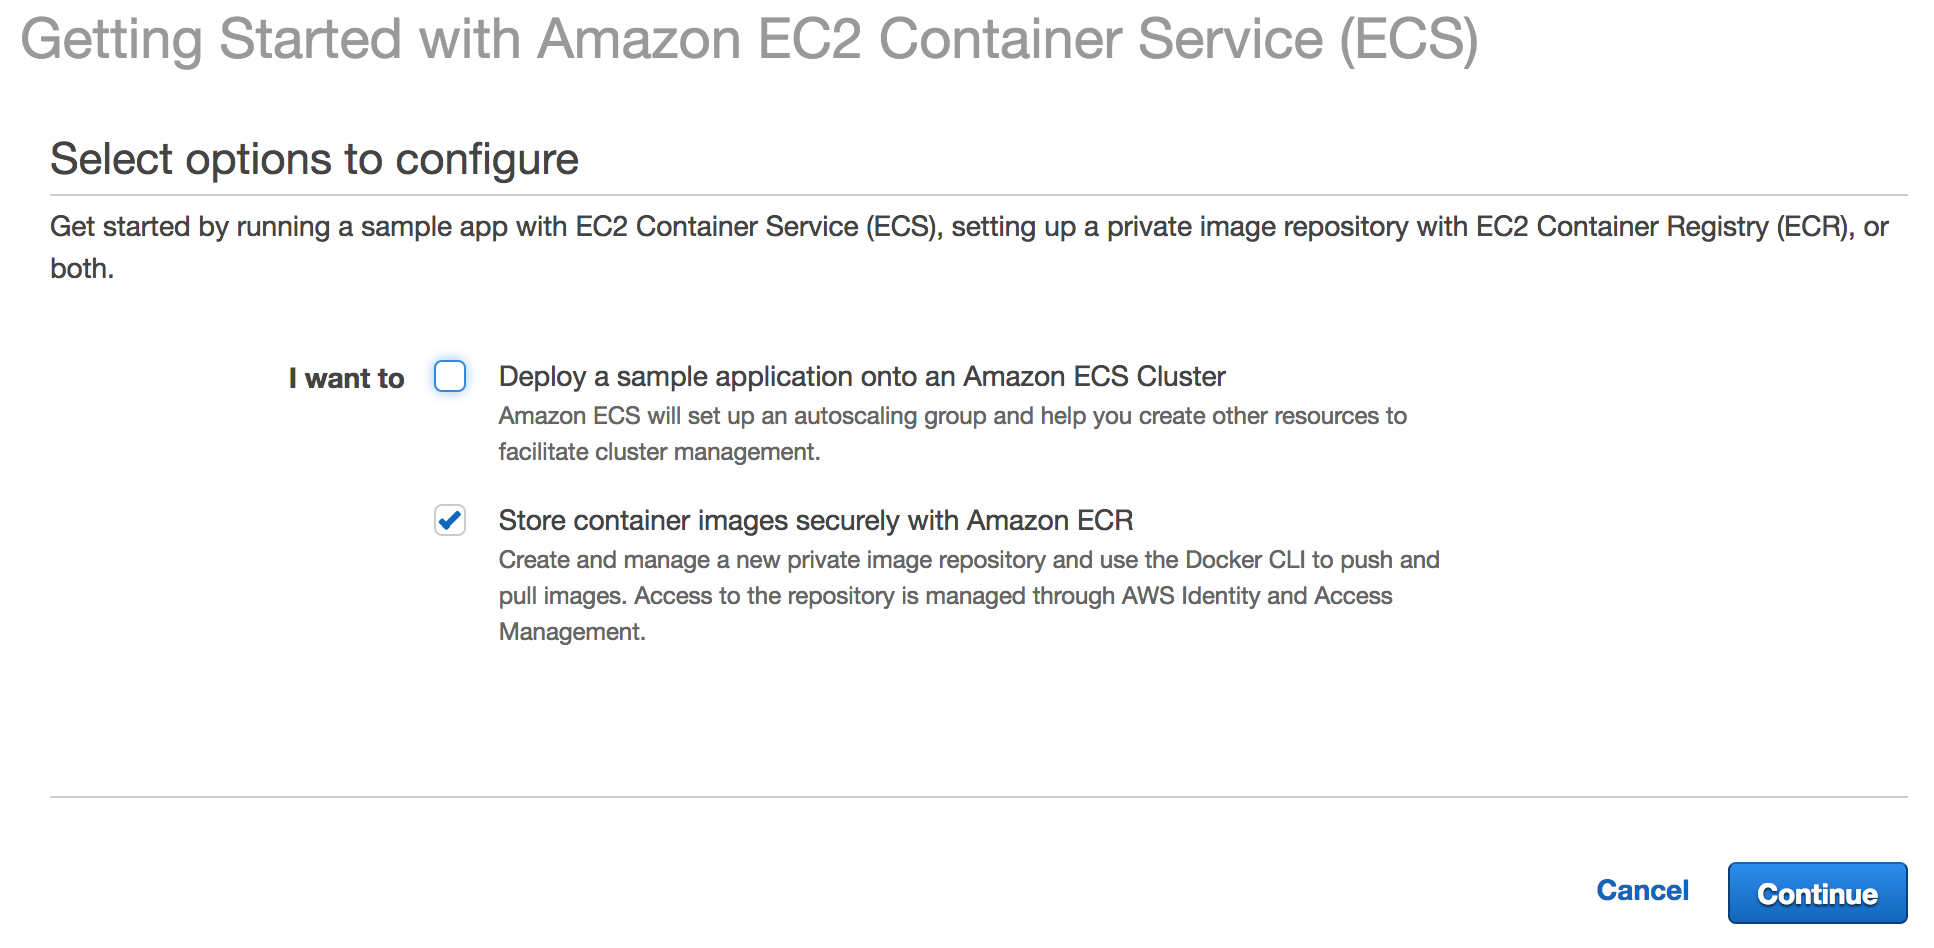
You will find yourself on the “Get started” page, you just have to push the blue “get started“ button in the middle of the page.
On the next screen (Getting Started with Amazon EC2 Container Service), uncheck the box so the ECS demo (sample) will not be deployed
1b – If you have already used ECS
You just have to go to “Repositories” then click on “Create Repository”
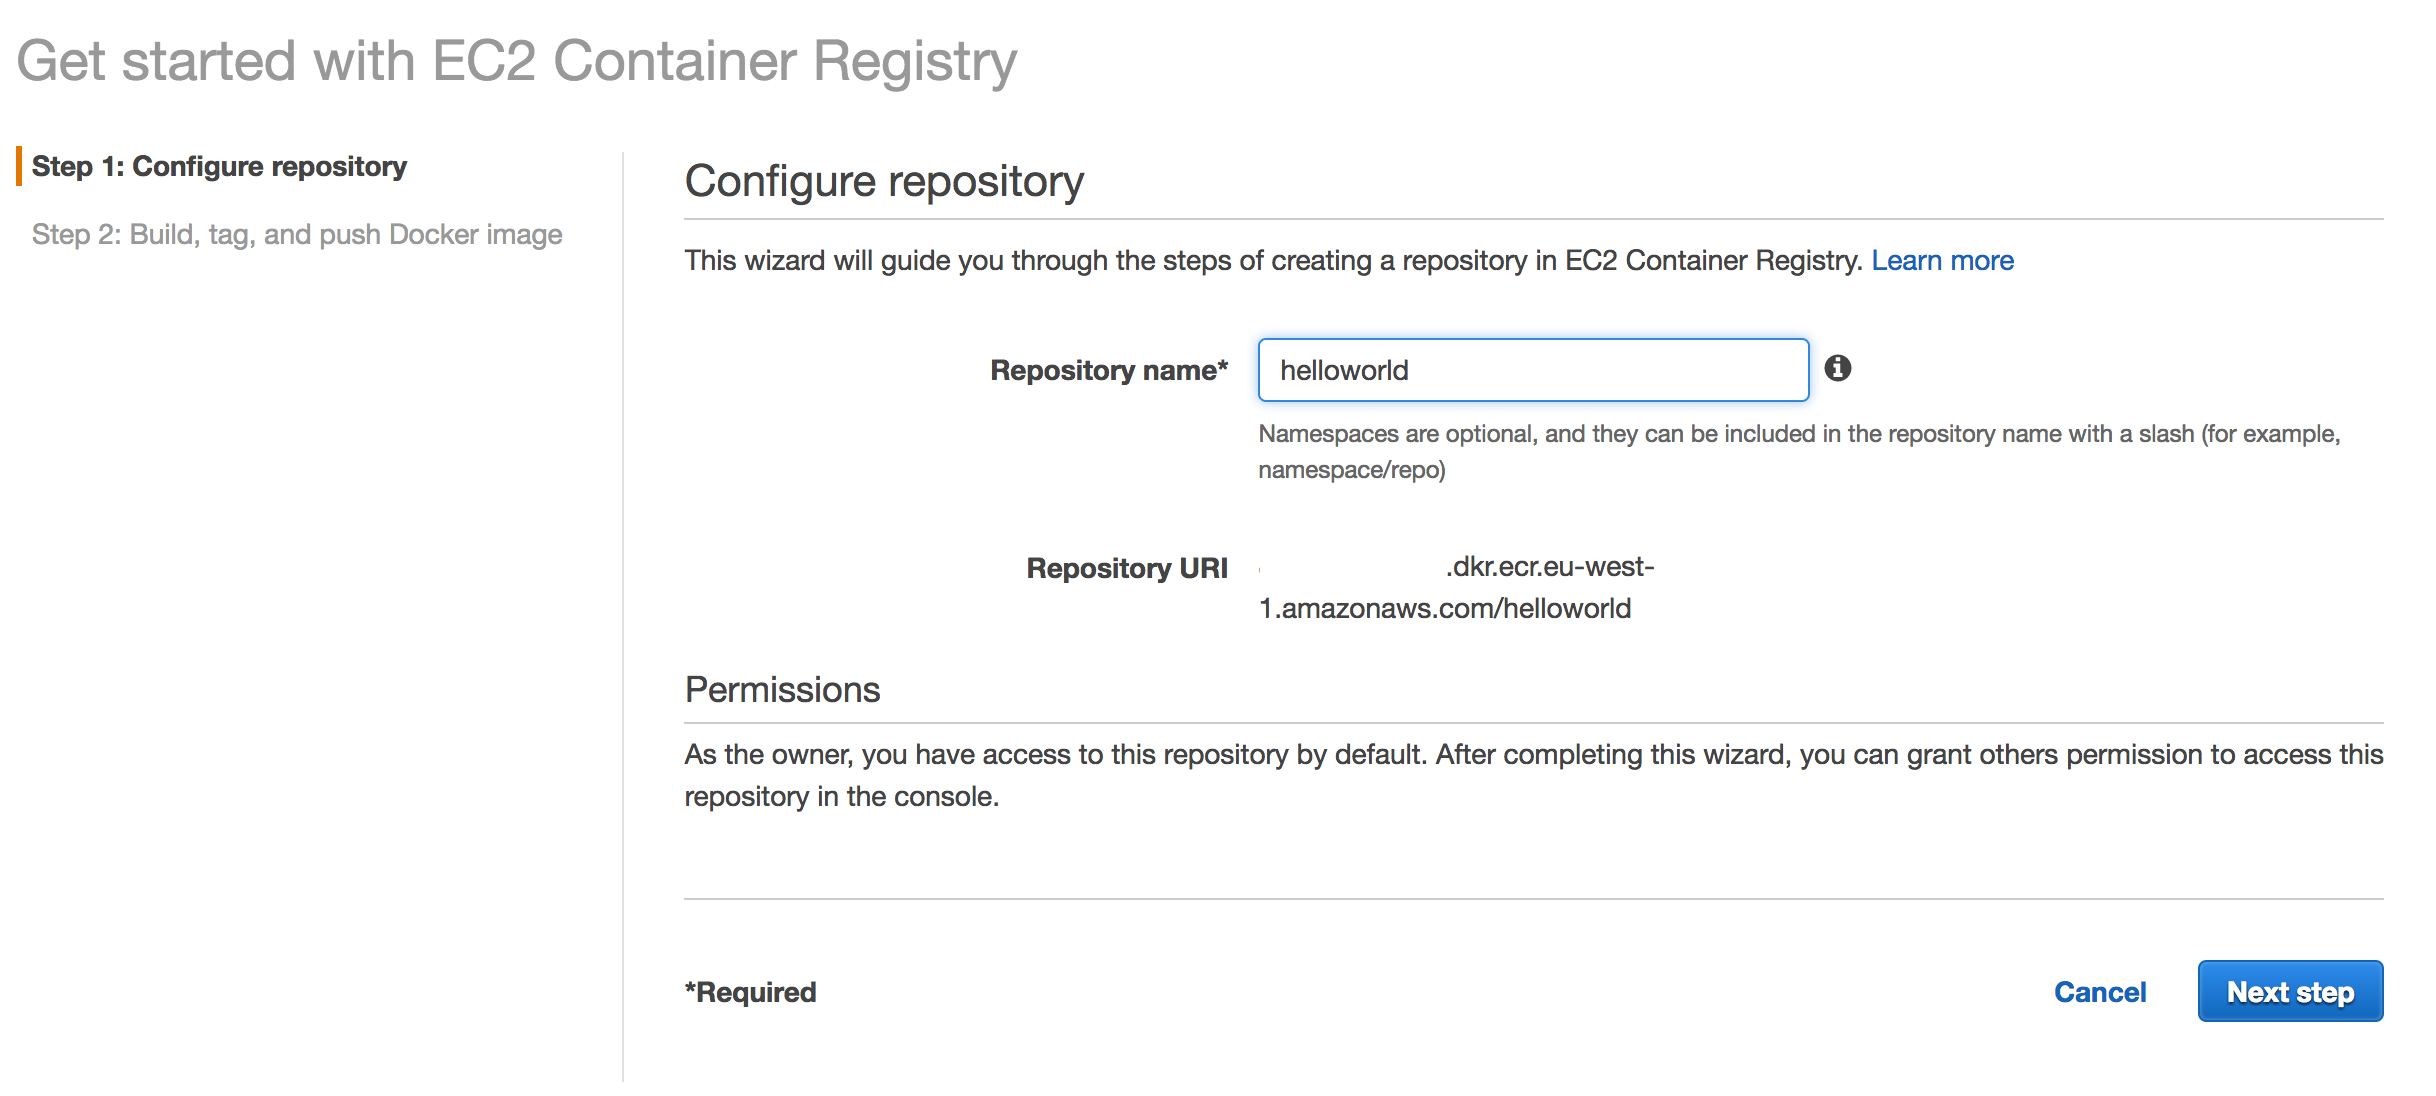
2 – On the next page
You will be able to give a name to your repository , helloworld on our case. Then you can click on “Next step” button
3 – The final page
It will give us all the information needed to use the created repository.
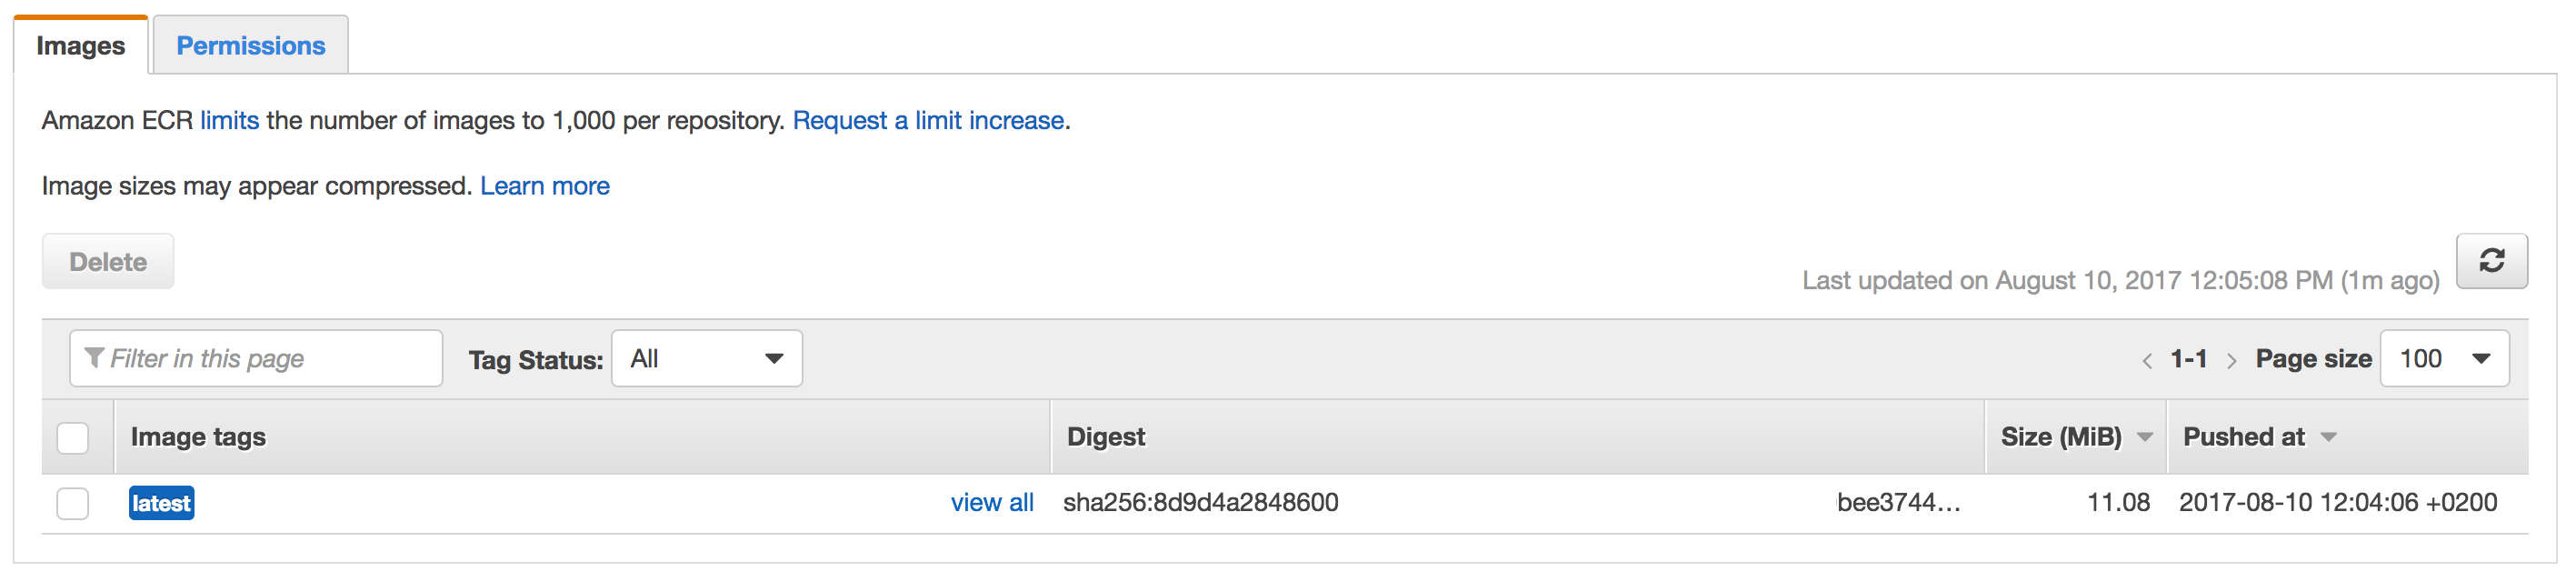
2 – Add an image to ECR
We are going to push our HelloWorld image to the repository. To do that we are going to connect on ECR from our machine (our repository is in ireland)